Importing locomotives
If you already track your locomotives in a spreadsheet, importing is faster than adding them one at a time. Locomotives import separately from cars since they capture different fields: road number and model instead of a car type and home location.
Prepare your CSV
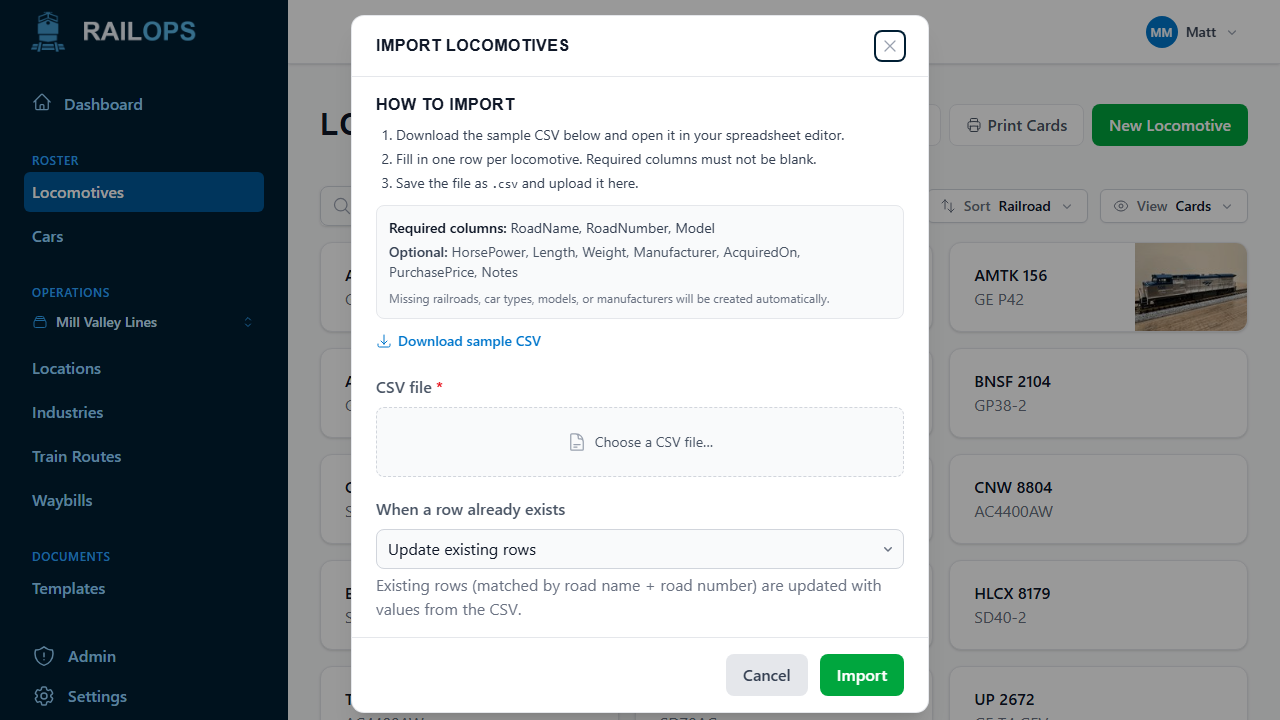
- Go to Locomotives, open the ⋮ menu next to New Locomotive, and select Import.
- Select Download sample CSV to get a template with the right column headers.
- Fill in one row per locomotive, then save it as
.csv.
Required columns: RoadName, RoadNumber, Model
Optional columns: HorsePower, Length, Weight, Manufacturer,
AcquiredOn, PurchasePrice, Notes
RoadName is the railroad's reporting mark (BNSF, UP, CSXT), up to 10
characters. Write dates as YYYY-MM-DD. Column order doesn't matter, and
common alternate headers work too: Road, Number, HP, and Comments all
map to the right field.
Any railroad or locomotive model your CSV references that doesn't already exist in Rail Ops gets created automatically, so you don't need to set those up first. New railroads use the reporting mark as their name, and new models start with just a name; fill in the rest under Settings → Locomotive Models.
Choose what happens to existing rows
Rail Ops matches CSV rows to existing locomotives by road name + road number. Under When a row already exists, pick how it should handle a match:
- Skip existing rows: leaves them untouched. Only new locomotives are added.
- Update existing rows: this is the default. The existing locomotive is updated with the values from the CSV.
- Replace existing rows: the existing locomotive is deleted and recreated from the CSV.
With either Update or Replace, a blank cell clears that field on the existing locomotive. If you only want to change a few columns, start from an export of your locomotives rather than a fresh sample file. That way every other column is already filled in.
Tip: Decoders and photos aren't part of the CSV. Replace existing rows recreates the locomotive, so use Update or Skip if you've already added those by hand.
Select Import once your file is ready.
If some rows don't import
Rows are checked one at a time. A row that's missing a required column or has a bad value gets skipped, and the rest of the file still imports. If a locomotive you expected is missing afterward, check that row, fix it, and import the file again with Update existing rows.
Next
Locomotives without a decoder, photo, or acquisition details import fine. Add those later from each locomotive's own page. See Managing your locomotives for adding one by hand and filling in the rest. To get your fleet back out as a spreadsheet (or into JMRI), see Exporting your roster.