Generating waybill cards
"Generating" a waybill card means printing it, turning the shipment data you built in Creating waybills into a physical card you can hand to an operator. Printing uses a document template, the same system that drives car cards, loco cards, and station signs.
Set up a waybill card template
If you haven't made one yet:
- Go to Documents → Templates and select New Template.
- Choose Waybill Card as the document type.
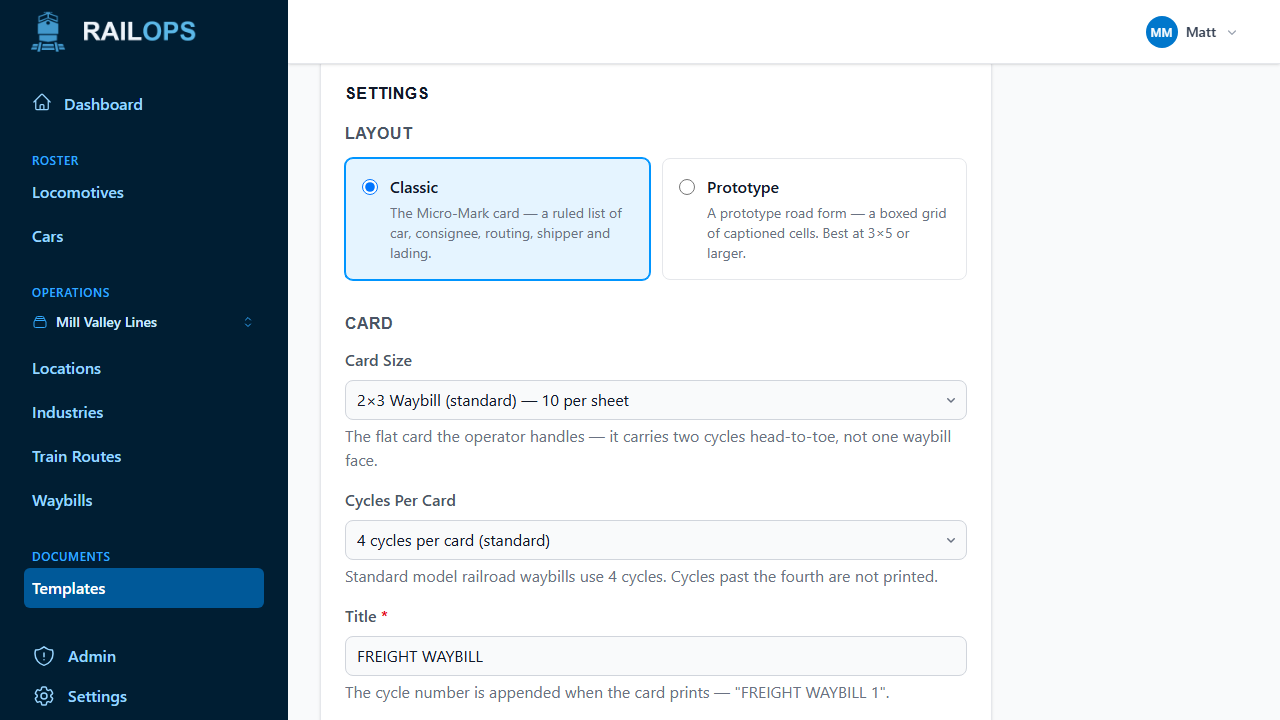
- Pick a layout:
- Classic — the familiar ruled list: car, consignee, routing, shipper, lading.
- Prototype — a boxed grid styled after a real railroad's waybill form. Works best at 3×5 or larger.
- Set the card size. 2×3 is the standard waybill size and fits 10 to a landscape Letter sheet; the larger index-card sizes fit fewer per sheet but read easier across the layout.
- Choose cycles per card. Most model railroads use 4. Cycles beyond the fourth won't print.
- Pick which fields to show (shipper/consignee, routing, lading, car type, track info, load state) and style the card to taste.
- Save the template.
Print your cards
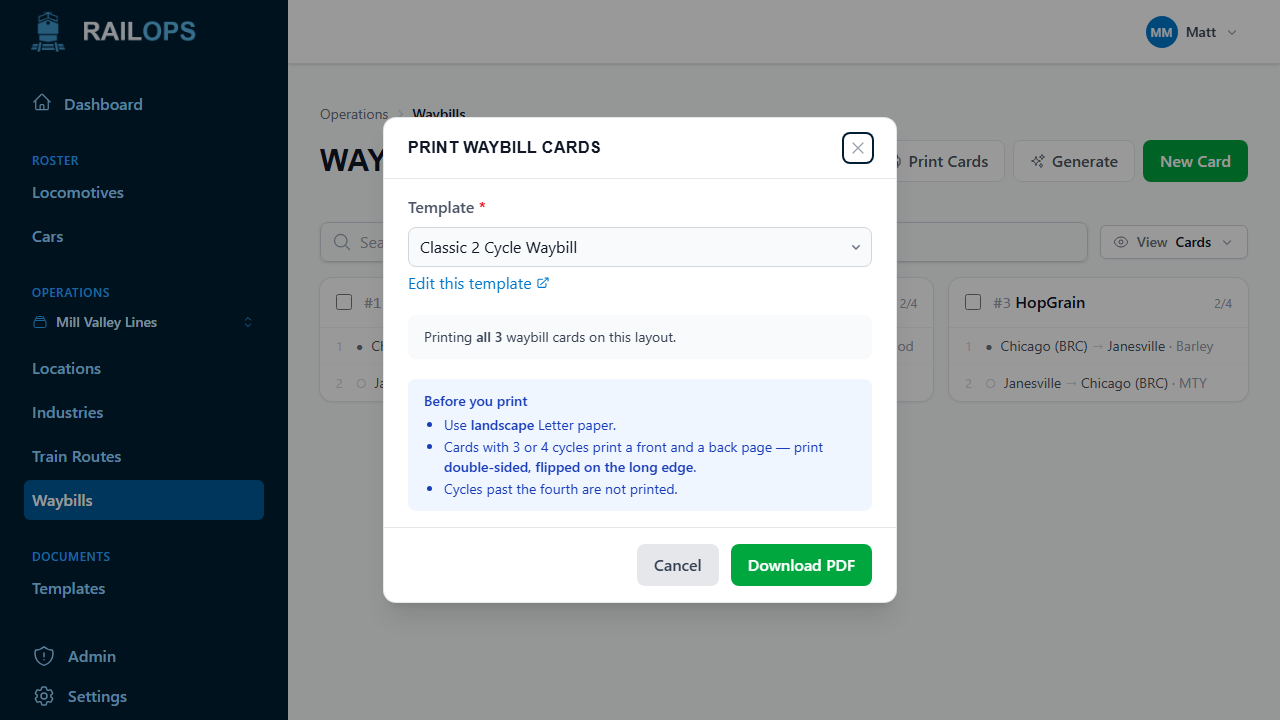
- Go to Operations → Waybills and select Print Cards.
- Choose the template.
- Select Download PDF.
Every waybill card on the layout with at least one cycle gets printed, so there's no need to select cards individually. Cards with no cycles yet are skipped automatically.
A few things to know before you print:
- Use landscape Letter paper.
- Cards with 3 or 4 cycles print a front and a back page, so print double-sided, flipped on the long edge so the back lines up.
- Cycles past the fourth don't print, even if the card has more.
Next
That's the full loop: set up locations and industries, build waybill cards and assign them to cars, then print. Come back to Generate on the Waybills page any time you add new car types, and reprint whenever a card changes.